OVERVIEW
HighRI set out to produce a method for accurate calibration of metrology tools and equipment. The achievable surface quality of optical surfaces is metrology limited.
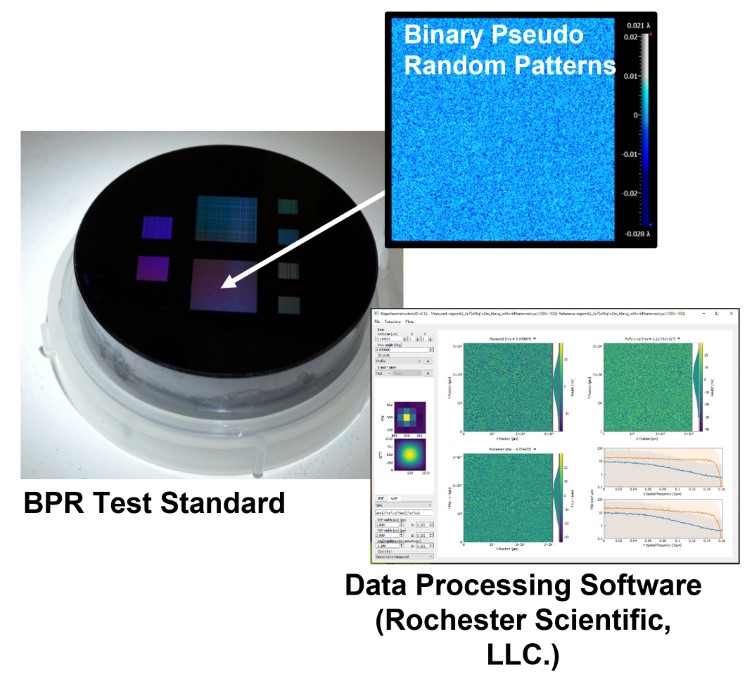
Binary Pseudo Random Test Standard is the next generation calibration test standards which provides complete information of the instrument transfer function (ITF), that, along with accompanying software, will allow both quantitative calibration and image reconstruction.
The groundbreaking and award-winning work pushed characterization technology forward, ensuring accuracy and reliability for the future of nanoscale metrology.
KEY METRICS AND RESULTS
- Binary Pseudo Random Test standards are fabricated with the fundamental sizes between 1.5 nm and 15 µm
- Easy to implement; no hardware change is necessary
- Metrology tools can be calibrated for its best performance
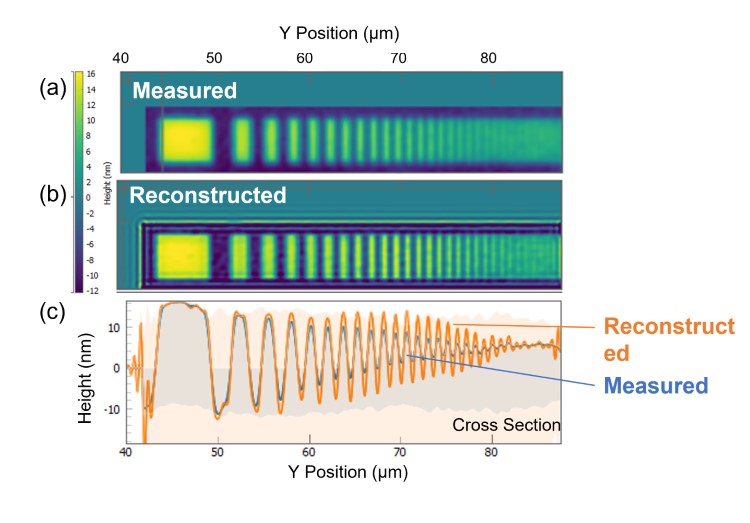
- Image reconstruction based on measured ITF
- Customizable BPRA test standards based on the application

BENEFITS
Highlights:
- Full field-of-view and full dynamic range ITF characterization
- Quantitative image reconstruction based on the measured ITF
- ITF can be deconvolved from subsequent images made of any other objects
For software, please contact our partner company, Rochester Scientific, LLC.
https://rochesterscientific.com/

BENEFITS
Highlights:
- Full field-of-view and full dynamic range ITF characterization
- Quantitative image reconstruction based on the measured ITF
- ITF can be deconvolved from subsequent images made of any other objects.
For software, please contact our partner company, Rochester Scientific, LLC.
https://rochesterscientific.com/

CHALLENGES
High-accuracy metrology is vitally important in manufacturing and optimally using ultra-high-quality free-form mirrors designed, for example, for space X-ray telescopes to manipulate X-ray light with nanometer-scale wavelengths. Due to the shorter wavelength, requirements on the surface figure (shape) and finish (roughness) of X-ray mirrors are many orders of magnitude more stringent than for visible-light optics.
HighRI needed to verify optical surfaces with highest quality and precision. The difficulty was being able to measure microscopic features, often at or past the measurement tool’s limit. Given the instrument was at or near its limit, it was difficult to determine if it was the tool’s limit or the actual optical surface.
This necessitated the need for characterization or proper optical calibration of the tool. Unfortunately, at the nanoscale level, there was no comprehensive, reliable, and consistent way to do this.
APPROACH AND SOLUTIONS
Binary Pseudo-Random Test Standards
Binary Pseudo-Random Array (BPRA) test patterns are based on a patent by Lawrence Berkeley National Laboratory and Brookhaven National Laboratory*, which is specifically designed and fabricated to measure the spatial frequency response of the instrument.
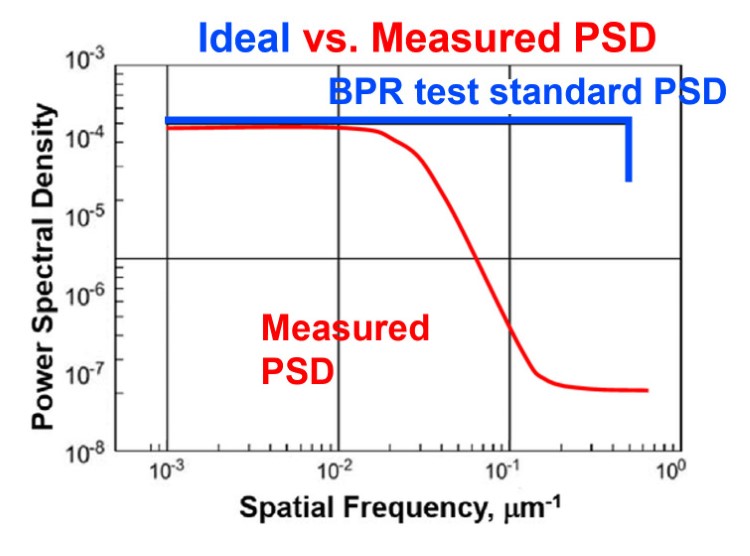
The designed patterns involved thousands of lines with precisely designed linewidths; these lines were combined in such a way that the distribution of linewidths appears to be random at any location. Binary Pseudo Random Test standards are “White Noise” patterns, that would result in flat spatial-frequency response when recorded with an ideal imaging system. The observed observed deviation from a flat PSD is a measure of the ITF over the entire dynamic range of the instrument.

